Showing posts with label Alterations. Show all posts

Monday, 21 October 2013

Tutorial: Shortening a Bra Band

When it comes to bra fitting, I have a philosophy of independence. I want myself and all women to know their shape and what fits them without needing to rely on commercial interests for that advice. I also want myself and all women to be free from the sometimes tiny constraints of the full-bust market--that is, I want us to be able to work with what is available, even when it is not good, to move  past the limitations of the market so we can get what we need. That is why I am an advocate of knowing how to sew--sewing is power, and if you know how, your bra world opens up to include models that wouldn't otherwise work for you. Sewing and alteration enable us to improve fit faster than the glacially slow evolutions of the brands themselves.

For those of us who wear smaller band sizes, we often find ourselves frustrated that the bras we want don't go up to high enough cup sizes. You need to go up a cup size to keep the same volume when you go down a band size, but most bras cut off at a certain cup size across the board. So a brand will claim "We can't make this bra above a G cup", when actually, the 38G that is produced has the same cup volume as the 30J they refuse to manufacture.

I've heard a lot of people cautioning that taking in a band can be disruptive to the fit of a bra. However, I disagree. Think about it--within most brands, the cups are usually not 'scaled' from size to size--that is, the cups will be identical across the sister sizes. All you do when you take in a band is remove the length that has been added. There are, of course, inconsistencies that will arise with home alterations; however, in a general sense, there is no reason you should not be able to alter a band--even many sizes--and still get a good fit. The only real sticking point comes if the point where the strap hit the band is significantly changed. If you find this is the case, you may actually like the results--it's nice once in awhile to have your bra straps sit somewhere slightly different--or you can take in fabric on both sides of the strap to even out the position. I did not find this to be an issue.


I'm a huge fan of Freya's padded half-cup shape, as seen in my review of the Patsy. However, I've been unimpressed with their lack of speed and enthusiasm in expanding the cup sizes for this shape, so I decided Freya's padded half-cup would be a good model to use for this post.

In this tutorial, I'll show you how I turned a 38FF Freya Daphne padded half-cup into a 32H. Since I modeled the alteration after a bra with the same shape, I was able to be quite confident that it would work for me. If you are altering a bra that you haven't tried in the correct band size, be aware that cups can seem bigger when you try on a loose-banded bra, so make sure the bra you are altering has enough room in the cups. You should also model your alteration after a bra with similar cup width and similar level of stretch in the band; otherwise the results may be different than you would like.

I did this alteration on a machine, since it's much faster. However, this alteration can also be performed by hand--you just need to use a small enough stitch to hold in the mesh.

This is an alteration that likely can be removed without damaging the bra. As always, though, alterations are performed at your own risk.

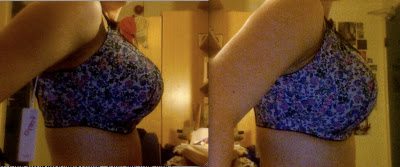
Here's the fit of the 38FF Daphne before alteration:


As you can see, it is massively too big in the band and rides up; the cups are therefore not supportive.

To begin, I compared the bands of my 38FF Daphne and 32H Patsy to mark how much material needed to be taken in.


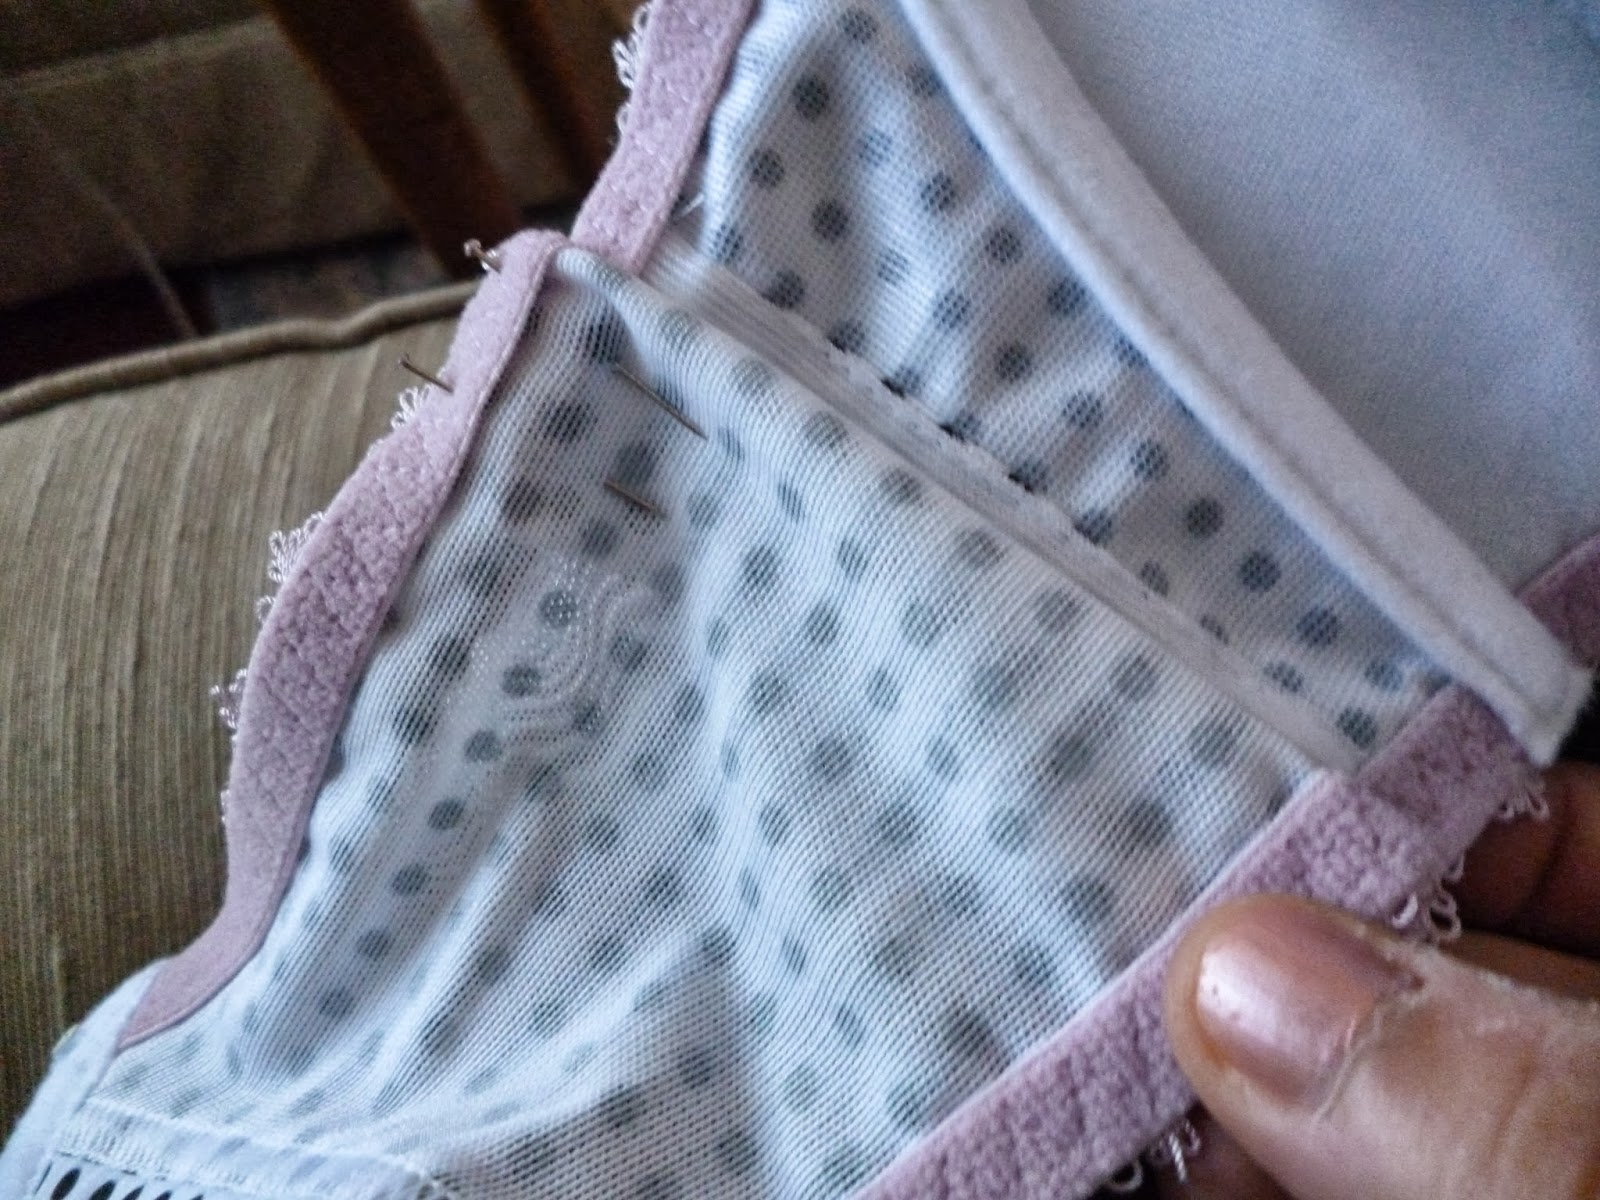
I then folded the band over itself and pinned it in place. At this point, you should double-check against the bra you're using as a model to make sure the band has the proper length.


My next step was simply to sew this fold in place, all the way around so the stitching forms a rectangle. The most important areas to secure are the horizontal seams that will actually hold the alteration in place, but the vertical seams add strength and keep everything in place. I used a small stitch to secure the mesh material, and I used a dark thread so it is visible for the tutorial.


That's all! I didn't cut any material out, but simply folded it inside so it does not show when the bra is worn. With this strategy, it actually helped that I was taking in a band so many sizes too large--there was enough material that the fold can lie completely flat. If you are taking in just one band size, you may find the fold a bit bulge-y and want to do it the other way, so it is on the outside, for comfort.

Here's the fit of the altered Daphne:


Tuesday, 6 November 2012

DIY Ruffle T-Shirt: Clothes For Big Boobs, Budget Edition

I was really inspired when I read this tutorial for a ruffled T-shirt on Tea Rose Home. It's a really cute blog written by a woman who does lots of crafty clothes-altering, and if you click around on her list of popular posts, you'll see she has done loads of ruffled T-shirts!

I wanted to try to combine the ruffly element of the project with some of the alterations I regularly do on giant baggy men's clothes to get a custom fit for my bust. If you would like a reminder of the ol' "trace a top that fits onto the giant top and sew along those seams" deal, you can see my posts on that here and here.

This is the finished product that I'm going to show you how to make:


To do this project, you'll need a t-shirt of the length and color you want. In the Tea Rose Home tutorial, she uses two t-shirts, and cuts one of them apart into strips to make into ruffles. If you want to use just one shirt, like I did, you will need a shirt big enough that the fabric you take in off the sides will be enough for the ruffles. Alternatively, you could also use a normal-sized long-sleeved top and cut off the sleeves to use that fabric as your ruffles. I prefer to use large men's t-shirts because they end up the length of tunics on me.

In my post on altering the sweatshirt, I mentioned that once you've taken in the seams, you should test the fit by trying on the item inside out. That way, you can make sure that the fit is not too loose or too tight, and the extra fabric won't bunch up inside and make it hard to tell. I figured I should share a photo of how hilarious it looks when you do this. Here's my light blue, $3.99 CVS Pharmacy men's t-shirt taken in:


Once you've verified the fit, cut off the extra fabric on the sides. Try to cut close the seams and keep it neat, because these scraps are what you will use to make the ruffles. After I cut off the extra fabric, I trimmed off the section that had been part of the sleeve and then cut each strip down the center (what would have been the sides of the shirt). This left me with four strips.


Then I trimmed those strips so that they were relatively even and rectangular. I found, working with cheap cotton jersey, the strips tended to roll up and were pretty annoying to work with. But for some reason, this tendency went away once they had become ruffles, so just work carefully and don't worry too much about the rolling at this point.


Next step: the neckline. If you like the neckline of the t-shirt as it is, you can skip this part and leave it as is. But I find men's t-shirts tend to have necklines that are a bit too high and a bit too rough-looking to go with what I wanted, so away it went. With the t-shirt still inside out, I traced the neckline of another top onto the front:


To line up the back neckline, I cut the back so it was the same as where the front of the neckline had originally been, like so:


With the front cut out, I was left with this:


 And I then simply cut the back so it lined up with the front. That way, it all ended up being fairly symmetrical. But you can cut the neckline however you want. I would just caution to make sure to cut it a tiny bit higher than you think you need, as it will not be hemmed in the back and will therefore stretch slightly with wear.


 The finished neckline:


 Next, it's time to prepare the strips into ruffles. You pretty much need a sewing machine for this, although perhaps if you don't have one you could MacGyver something. To create ruffles on a machine, set the stitch to a straight stitch on a very wide setting--on my machine, I turn the dial past 4, to where the stitch length setting just looks like this - - - - - - - -

Don't sew backwards to seal the seam at the beginning or end--you want to be able to pull the threads to create the ruffle. You basically just sew one straight seam along the top edge of the fabric strip. Once the seam is sewn, grab the top thread and gently pull the fabric into a ruffle. I actually found I didn't need to pull it myself, because the strip got ruffled just by sewing it on that wide setting.


I made three ruffles and lined them up as they would sit on the t-shirt.


At this point I decided I wanted the top ruffle to be thinner, so I cut the fourth strip of fabric in half lengthwise and sewed that into two more thin ruffles. I layered those slightly--you can see they meet and cross in the middle.


With everything in place, I pinned the ruffles in place and then sewed them with a regular, thin stitch (not the same wide stitch you'd use to make the ruffles). When you pin the ruffles, make sure that they are close-set enough that the ruffle above will cover the seam of the next ruffle down. The seam at the top will show, but if you use a matching thread color, this shouldn't look very messy.

The final step is to go over the shirt and trim all the loose threads that are left--there will be a lot! Trimming all the loose threads is essential when you're doing DIY projects that you intend to wear because a single loose thread will make it obvious that you made the top yourself, which in my opinion sort of takes away the mystique of the whole thing.

You can also shorten or hem the sleeves if you'd like, but I just folded mine up to a shorter length. And here's my finished budget ruffled top for big boobs:


I hope you enjoyed this tutorial! I have been enjoying doing sewing projects and alterations recently and I have more posts like this to come.

Wednesday, 31 October 2012

The Flirtelle "Lucy": A Cinderella Story


At the same time that I was ordering the Curvy Kate Smoothie from Brastop, I noticed that they had some new Flirtelle bras. One of them was the “Lucy” in a couple of new colors, including this Silver shade:


Now, like a lot of Flirtelle’s new releases, this bra only starts at a 32 band. I also knew it was the same design as the Flirtelle Sublime, reviewed here, which had stiff fabric that I hated. What’s more, Flirtelle and Curvy Kate unpadded balconettes just don’t give the best shape on me, especially after a few hours, so I’ve mostly given up on them. (Apparently this is called an "upside down 7" look. I'm not sure who coined this phrase but I love it! I just got it from this Bratabase question and answer.)

Those are three good reasons why I could have overlooked the Flirtelle Lucy. (I really wish ever brand ever didn’t have a bra called Lucy, but I digress…) BUT—I have been seeking an unpadded gray bra for literally years. Options were slim, including Freya’s Lucy bra, which I never found:


Kalyani’s Natural Charm bra, which I was convinced would give a bad shape:


And the Fantasie Belle in Silver, a bra which I really dislike:


And that was just about all. So I knew I couldn’t let the Flirtelle Lucy get away as long as there was any slim chance that I would be able to alter it into submission. I ordered a 32H, sister size of my normal 30HH for Curvy Kate and Flirtelle.

When the Lucy arrived, I was unsurprised to find that the shape it gave on me was not great:


It’s not horrid, but it did make my boobs have a lot more projection than I prefer, and consequently there were wrinkles along the diagonal seam across the cup. You can see some of the empty space here:


Because of this, I knew I would be able to take in the center seam to make the shape more round, as I described in the tutorialin this post, “Making a Pointy Bra Round”:

I decided to try doing the alteration on my sewing machine this time. I was a little nervous that sewing such thick fabric would be impossible, but it worked just fine.


It was also EONS faster than the agonizing, painstaking process of hand-sewing something so thick (think thimbles and tweezers—I would probably have made faster progress with an awl).

Because I was machine-sewing, I also decided to pin the seam rather than taping it this time around. I just taped the very ends of the alteration to make sure that part was smooth.


Here’s the difference in shape, Before:


And after: 


Because the band was a 32 band, and the cups were angled in a very V-neck shape, going high up towards the straps, I decided to take in the center gore as well. This serves three functions—it takes some length out of the band; it “turns” the cups so the shape is less plunge-y and more half-cup-y; and it provides a little extra openness in the top of the cups, which I needed after taking in so much fabric from the cup.

I decided to do the alteration on the center gore on my sewing machine as well, which was a mistake as I almost broke my needle by hitting the underwire accidentally. I also did it rather off-center and sloppily as it is very hard to fit the center gore of a bra under the foot of a sewing machine. I’ll probably fix that later.


The one issue I expected would be really problematic, the bulk of the altered diagonal seam, wasn't as big of a problem as I expected. It does show through tops, especially a thin t-shirt like the one I'm wearing in the photos. 


But in my day-to-day life, I always wear a tight cami underneath my tops. With the cami-top combination, the seam blends in more, and although it still shows, it doesn't look bizarre.

The center gore doesn't lay perfectly flat, but overall I’m really pleased with the results of my alterations. I expected to feel as though I was fighting a losing battle or would never wear the bra. But it’s an unpadded gray bra! I’ve worn it repeatedly and I’m pleased to report that so far, the shape stays pretty good throughout the day. I even wore it to do yoga and nothing went horribly wrong.

Owning a gray bra is all that I hoped and more. I know some people consider it a plain or neutral color, but I’m a little obsessed. I think it’s an amazingly flattering color on brunettes and redheads especially. Wearing a gray bra with matching gray undies I got from Forever21, I feel a little extra boost of cheerfulness all day. I still maintain hope that Cleo’s Lucy bra will eventually come out in a gray color, but this Flirtelle Lucy will sustain me happily until that time. 

Friday, 21 September 2012

Clothes For Boobs, Budget Edition: Dumpster Sweaters & Giant Baggy Sweatshirts

Being somewhat ambivalent about the clothes from companies that design specifically for a busty figure, I tend to take a different tack with dressing myself. I've already posted about tailoring clothes that you have to wear that are absurdly ill-suited to big boobs and a smaller waist, but now let's look at this from a different angle. Specifically, I'd like to sing the praises of specifically seeking out giant shapeless clothes for the purpose of taking them in to perfectly fit your body. It's the cheapest way EVER to get a custom fit.

First: Dumpster sweaters. This is my affectionate term for sweaters that I have literally gotten for free from a town dump. Some towns have a section of their dump where people can drop off things that are still usable, usually called a "Swap Shop" or "Swap Shack". Residents of the town can then go in and take whatever they like. Whenever I've found myself in one of these places, I tend to grab all the men's sweaters I can find in colors I like. Obviously these sweaters are going to be very large and shapeless on me, but because they are free, I can fearlessly alter them however I like. Although not every town dump has a Swap Shop, you can also get large men's (or women's) sweaters for very cheap at Goodwill/Salvation Army/charity shops. Think $4 or so.

The process for this is just as I have described in my post on taking in my shapeless work polos: lay out the sweater flat, trace a sweater that fits you onto it, sew along the traced lines, and cut off the excess. And voila. I don't have any photos of me in my dumpster sweaters before I took them in, but here they are "After":


Not bad for the low, low price of $0.00! These still don't look quite as good as sweaters that are simply small enough to fit my waist, and stretchy enough to fit my boobs and hips, like this one:


But again, this is a sweater that I had to buy at a normal price ($25 or so, from H&M) whereas the dumpster sweaters were free. So it's a great way to triple your wardrobe if you're on a budget.

Next up: today's project of taking in a very large sweatshirt. If you're anything like me, you've probably acquired a sizable stack of oversized t-shirts that you get for free from races, companies, promotions, college acceptances, blah blah blah. I usually take in these t-shirts to get cute, longer t-shirts to work out in. But I've also had, for ages, this giant sweatshirt that I was given as a gift years ago. I finally decided it was  time to make it wearable, so I decided to try my hand at altering a zip-up hoodie. Here's what it looked like to start with:

Text blurred out to keep it secret where I go to school :)


I laid it out inside out and traced my purple dumpster sweater (which is a perfect custom fit for my body) onto it. Note that this sweatshirt is so much too big for me that I need to take in the sleeves, too, so I continued tracing the line onto the sleeves. But I didn't want to take in the cuffs, so I split the difference. This way, the finished product will have slightly oversized sleeves and an oversized hood, which will add up to cuteness when juxtaposed with the fitted body.


Next, I sewed up the sides.

If you're worried about testing the fit before you cut off the excess fabric, with something like this where you've taken in such a massive amount of fabric, your best best is to try it on inside out to make sure it's not too small. This looks pretty hilarious, but will give you a good idea of whether you need to take in more, or rip out the seams and re-do it a bit bigger. If it seems like a good fit, cut off the excess. Here's the finished product:


All the sewing described in this post was done on a sewing machine (I have a Baby Lock "Anna" which I love). But it could also all be done by hand, since these are just simple straight seams. It would just take a little longer, that's all.

I hope I've inspired you to feel as though you don't need to pay a lot for clothing, even if you have a tricky body type and want a custom fit. Let me know in the comments if you try a project like this!

Friday, 3 August 2012

How To Make A Pointy Bra Round!

Sorry for the delay in posting this tutorial. I had to get major dental work done this week and was so drained by it that I couldn’t inspire myself to do anything other than watch Olympic volleyball with my dog.

Anyway,  you might remember in my last post I showed a method for making a high-cut bra look lower-cut. I’m going to show the alteration to make a pointy bra give a rounder shape on the same bra I showed in that tutorial, but you don’t need to do both together. You can make a bra more round even if you haven’t done any other alterations on it. And in fact, this alteration is in some ways simpler than the alteration that makes a bra lower-cut. To make a bra more round, you don’t need to cut anything, and you can take out the stitching at any time without significant damage to the bra itself. I still wouldn’t recommend doing this to an expensive brand-new bra, but use your judgment and proceed at your own risk. I also wouldn’t recommend doing this to a bra that is too small or close to too small in the cups. The nature of the alteration takes some of the space out of the cups, so it’s better to do this on a bra that fits well or runs a little big on you. However, you won’t lose a whole cup size—more like 1/4 of a cup size, if that--unless you go really wild with it. This alteration will also probably not work with a bra that has a thin lace or mesh upper section—it will only work with fabric that has enough weight to hold a stitch.

The concept for this alteration is pretty basic. Think of it like this: a bra that gives a pointy shape does so because there is too much depth in the cups compared to their width. A view from above:

So to make that pointy-shaped bra give a round shape, you want to take in some of the fabric at the apex so the cup will have less depth compared to its width. Like so:

From the front, the alteration will look like this:

The red line along the seam will be brought up to the red line above the seam. What you will do is take in some of the fabric along the seam that goes diagonally across the cup. Basically you will pull the bottom sections up over the top section and stitch them in place there. When you’re finished, the bottom sections will look the same but the top section will look a bit smaller. It really doesn’t take much to significantly change the shape a bra gives. On my Pippa, I took in slightly more than half an inch at the deepest point of the alteration.

To start, put on your pointy-shaped bra and grab the seam that we are going to sew along. Pull it up over the top section and see how it looks from the side. Try to get a gauge of how much you are going to want to take it in. When you find the best position, tape it in place at the center of the seam (I used scotch tape) and take the bra off.

Now, place the bra over your knee and tape the whole seam.


It’s not going to be at the same width the whole way around. Instead, you will take in the most fabric at the center of the seam and taper off to nothing as you approach the bottom and top of the seam. Remember that you can’t take any volume out of the underwire, so you have to get all the way back out to the normal seam before it hits the underwire. This will probably make more sense to those who sew regularly. For those who don’t, it is ultimately going to look something like this:


When you’ve taped all across the front of the seam, turn the bra inside and tape the inside too. First make sure that the fold is as flat as possible—you want to be sewing three layers of fabric, one of which is the seam, not a crumpled bundle of several layers. This is why I recommend taping. If you want to pin it, you can try to do that too but I think taping makes it a LOT easier to ensure a continuous rounded shape along the alteration.


If you do use the tape, you are DEFINITELY going to need a thimble or two to get the needle through all the layers of fabric and tape. If you don’t have any thimbles, you can make one out of many layers of tape wrapped around your thumb and pointer finger—that’s what I did. I used the tape-thimbles to get the needle partway through the fabric, and then used old tweezers to pull the needle all the way through. DO NOT use your teeth to pull the needle through—you might chip your tooth and it is not worth that risk. (That’s not why I had to get the dental work this week, but it would be a fitting cautionary tale if it was!)

Now that you’re all ready with your thimbles and tweezers and tape, start sewing. It’s sort of an involved process so take your time. I recommend starting at the bottom of the seam, near the underwire, and working your way towards the upper corner where the strap is. You might find that you need to pause a few times to rearrange the tape along the fold so it stays as neat as possible.

When you’ve sewn the whole seam, you should be able to rip the tape off along the stitches. If it’s a really thick layer of tape, be careful and hold the stitches down so the pull of the tape doesn’t distort them.

The finished result from the front:


And the difference from the side, here is the bra before alteration:


…and after!


Here are the two side by side.


I didn’t find that this alteration significantly changed the cup size of my Pippa, but as a couple of people pointed out in my last post, it was slightly big on me to start with. Like I mentioned earlier in this post, you are going to lose some volume in the cup by doing this alteration, so keep that in mind if the bra you’re working on is already a tight squeeze. However, you should be able to get a good idea of how it will fit from the way you tape it before you start sewing.

Here’s the same alteration (taped but not sewn yet) on a Freya Nieve, before:


…and taped for the alteration:


Before and after: